A Calm Checklist for Planning a City Bike Journey
Plan a city ride around the turns, crossings, access points, and navigation decisions that need attention before you set off.
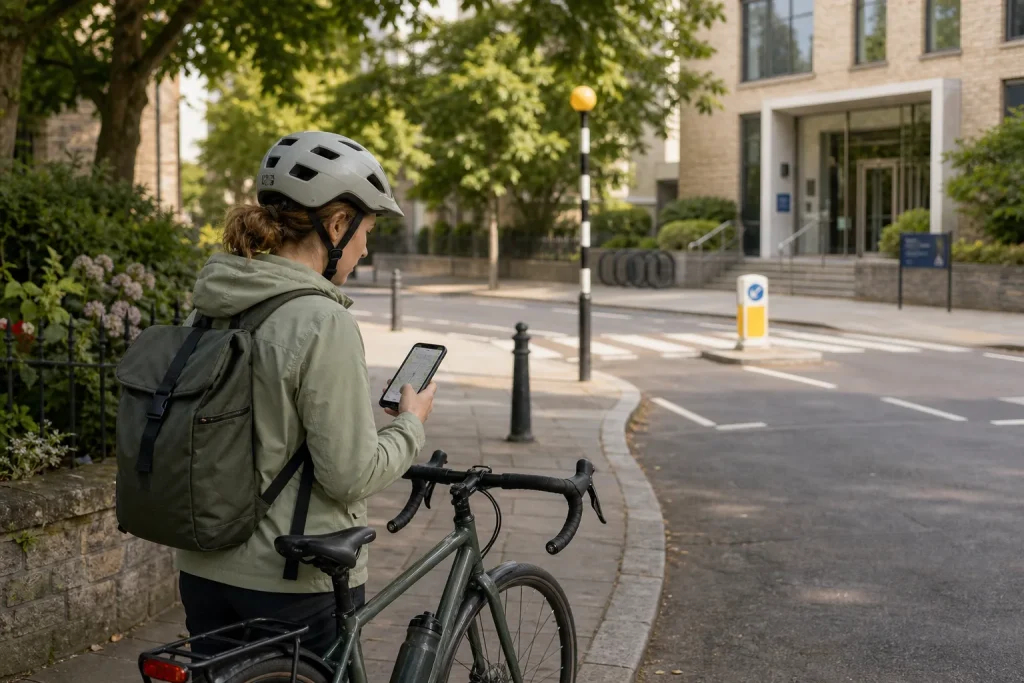
At a city intersection, the route that looks simplest on a screen can leave you unsure where to turn or where to wait. Before riding to a new address, check the junctions, entrances, and navigation choices that could interrupt your attention. A useful plan is less about drawing a perfect line and more about knowing what you will do at the points where the ride changes.
Confirm access at the destination
Enter the exact entrance you need, not just the venue name or neighbourhood. A library, apartment block, or shopping centre may have several entrances, and the map pin may land on a vehicle entrance or a side of the building that is awkward to reach by bike. Check the destination’s own access information and look for a place where you may leave or secure your bike.
Decide what you will do if the intended entrance is closed or does not allow bicycle access. For example, identify another public entrance or a nearby place to stop and contact the destination. This avoids arriving at a locked gate and trying to work out the next move in a busy area.
Inspect the decisions that could interrupt your ride
Open a cycling map and inspect the route at each major turn, crossing, and change of street type. Look for junctions where you may need to cross traffic, choose a lane, or interpret several signs at once. Street-level imagery can help you recognise the layout, but it may not reflect current signs, roadworks, or traffic. Treat it as a preview rather than a live description.
Check the route for access restrictions and transitions that may be easy to miss: a cycle path that ends at a busy road, a shared path with a separate entrance, or a turn that depends on a marked crossing. If a junction feels confusing after inspection, choose a clearer approach or plan to stop before it and reassess from a safe place.
Notice where you will need to check directions. Choose safe stopping places such as a public square or a wide, permitted area away from pedestrian flow. Set your phone or cycle computer before moving, keep audio low enough to hear your surroundings, and stop before looking at a screen. Do not make a last-second turn because a prompt arrives late.
Make navigation useful without letting it take over
Break the route into a few recognisable cues, such as “follow the signed cycle path to the footbridge” or “turn after the library entrance.” These are easier to confirm than a string of rapid instructions. Note the turns that would be hard to recover from if you missed them, and decide in advance where you could safely pause to check the map.
Save a second route only when it answers a specific problem, such as an access restriction or a junction you would rather avoid. Name the route or note its starting landmark so you can find it without searching through several options while stopped. If your device loses its signal or battery, having a few key landmarks in mind gives you a way to reach a safe stopping place before deciding what to do.
Check conditions against your actual plan
Before leaving, consider whether weather, visibility, or available time changes how you want to ride. If rain makes a shared path difficult to use, or darkness makes a turn hard to read, select a better-suited route or another way to travel. Have lights ready when visibility is reduced or local rules require them, and pack a layer if changing conditions could make a stop uncomfortable.
Allow room for traffic lights, navigation pauses, and access questions. If you have a fixed arrival time, avoid relying on every turn going exactly as expected. On the ride, treat the plan as adjustable: stop somewhere safe when a route no longer fits the conditions, then decide whether to continue, reroute, or walk a section where that is permitted and practical.
Use this checklist to settle key decisions before setting off
- Destination entrance: Check the exact entrance and any bicycle-access information. If the entrance is unclear or restricted, identify another public entrance or a nearby place to stop and ask for directions.
- Junction layout: Inspect each major crossing and turn on a map or street-level image. If a turn remains confusing, choose a clearer approach or plan to stop before the junction and reassess.
- Path access: Check whether each path allows cycling and where it joins the next street. If access is restricted or the connection is awkward, select a legal route that reaches the same destination.
- Navigation cues: Note the key turns and a recognisable landmark before each one. If a cue depends on a sign or entrance you cannot confirm, use a different landmark or save a clearer route.
- Safe stopping places: Identify a permitted spot away from pedestrian flow where you can check directions. If no suitable place is available at a tricky turn, choose a route with a safer place to pause.
- Device readiness: Set directions before moving and check that the device is usable for the ride. If it cannot provide directions reliably, write down or remember the key landmarks and stop safely if you need to check them.
- Weather and visibility: Check the conditions and whether your lights and clothing suit them. If the planned route feels unsuitable in those conditions, choose another route or another way to travel.
- Arrival flexibility: Consider whether your timing leaves room for a pause or access problem. If it does not, leave earlier, choose a simpler route, or contact the destination about access before setting out.
A worked hypothetical route to a library
Imagine a rider starting beside a residential square and going to a library whose main entrance faces a busy avenue. The map proposes an avenue-side approach with a turn across traffic. The rider is comfortable on quieter streets, wants to avoid that turn, and needs to reach the library before it closes. These are hypothetical details for illustrating the decisions, not a real journey.
The rider checks the library’s access information and sees that a public side entrance is available. They inspect the map and street-level imagery, then identify a parallel residential street that connects to a signed path near a park gate. They save that route and note the gate as a landmark. They also check where the path meets the library grounds; if it is closed, their alternative is to return to the residential street and approach the side entrance using the signed public road.
Before leaving, the rider sets directions and identifies a safe place near the park gate to stop if the map is unclear. The resulting choice is to use the quieter approach, accepting a less direct route in exchange for avoiding the difficult avenue turn. If the path is closed, the rider can stop, switch to the saved road approach, and reassess the arrival time rather than attempting the original turn under pressure.
Keep useful route notes specific
After the ride, make a brief note of decisions that may help next time: which entrance worked, where the path joined the road, or which turn was difficult to recognise. Avoid treating a saved route as permanently current. Access arrangements, signs, and street conditions can change, so check the details again before relying on the same route.
More useful reads
How to Make a Short Bike Ride Easier to Repeat
Build a small cycling habit around an existing commitment, a simple route, and preparations that make…
What to Carry on a Bike When You Have Errands to Run
Plan an errand load around the bike, the purchases, and the stops. Learn where to put…